Imagine being able to modify your applications to suit your requirements without getting all caught up in complex interfaces. Whether you are a developer looking for solutions to streamline operations, or just someone curious about optimizing workflows, configuration files (CFG files) can do it all. But how to make a text document a config file?
In this article, we will uncover the answer to this question. Moreover, we will discuss the reasons why CFG files are created and some tips to ensure their effectiveness. So, stay tuned and learn how to convert your documents to CFG files.
What is a Configuration File?
A configuration file stores all the essential settings and preferences for software applications including the page’s group default, project’s rule, language, and electrical features behavior. These versatile, text-based configurations can help you customize and control software actions without needing to reconcile or change the source code. CFG files are commonly used in video game development, software configurations, operating systems, and automation tools.
Steps to Make a Text Document a CFG File
CFG files act as a centralized platform to manage settings and make applications more adaptable. Converting a text document into config files can offer several benefits, especially when it comes to managing software behavior and system settings. Here is how you can transform text documents into configure files:
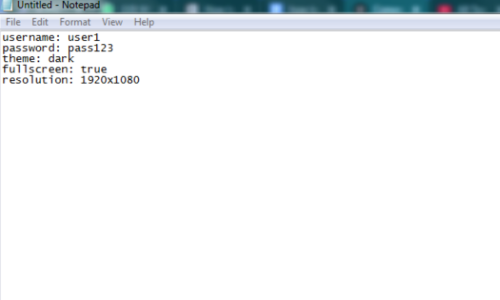
Step 1: Open the Text Document
Open the text document you wish to work on. You can use any text editor for it, such as Notepad, Sublime Text, or VS Code.
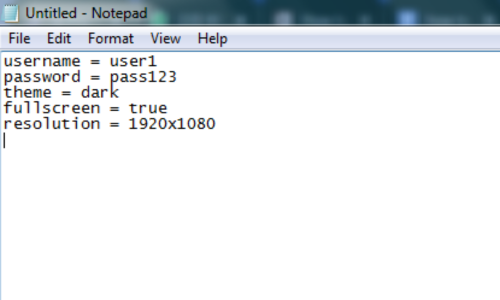
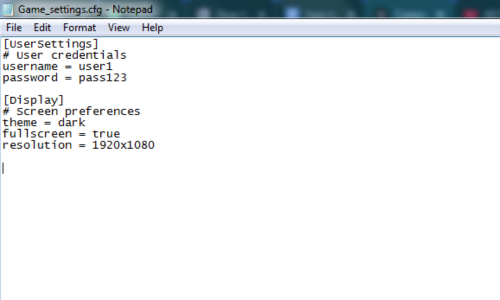
Step 2: Structure The Content Using Key-Value Pairs
Create a key-value pair structure by defining the key (setting name) and value (setting value). Since CFG files follow this structure, make sure that all the configurations are clearly defined with keys and values.
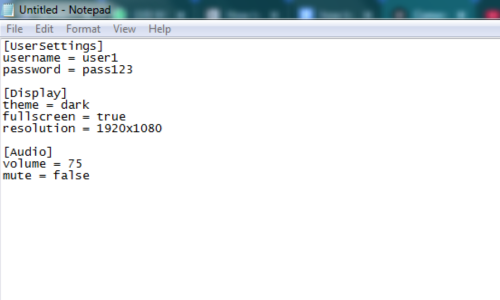
Step 3: Organize Settings Using Sections
Organize the configurations into sections using headers enclosed in square brackets([ ]). This improves the readability and maintainability of your configurations.
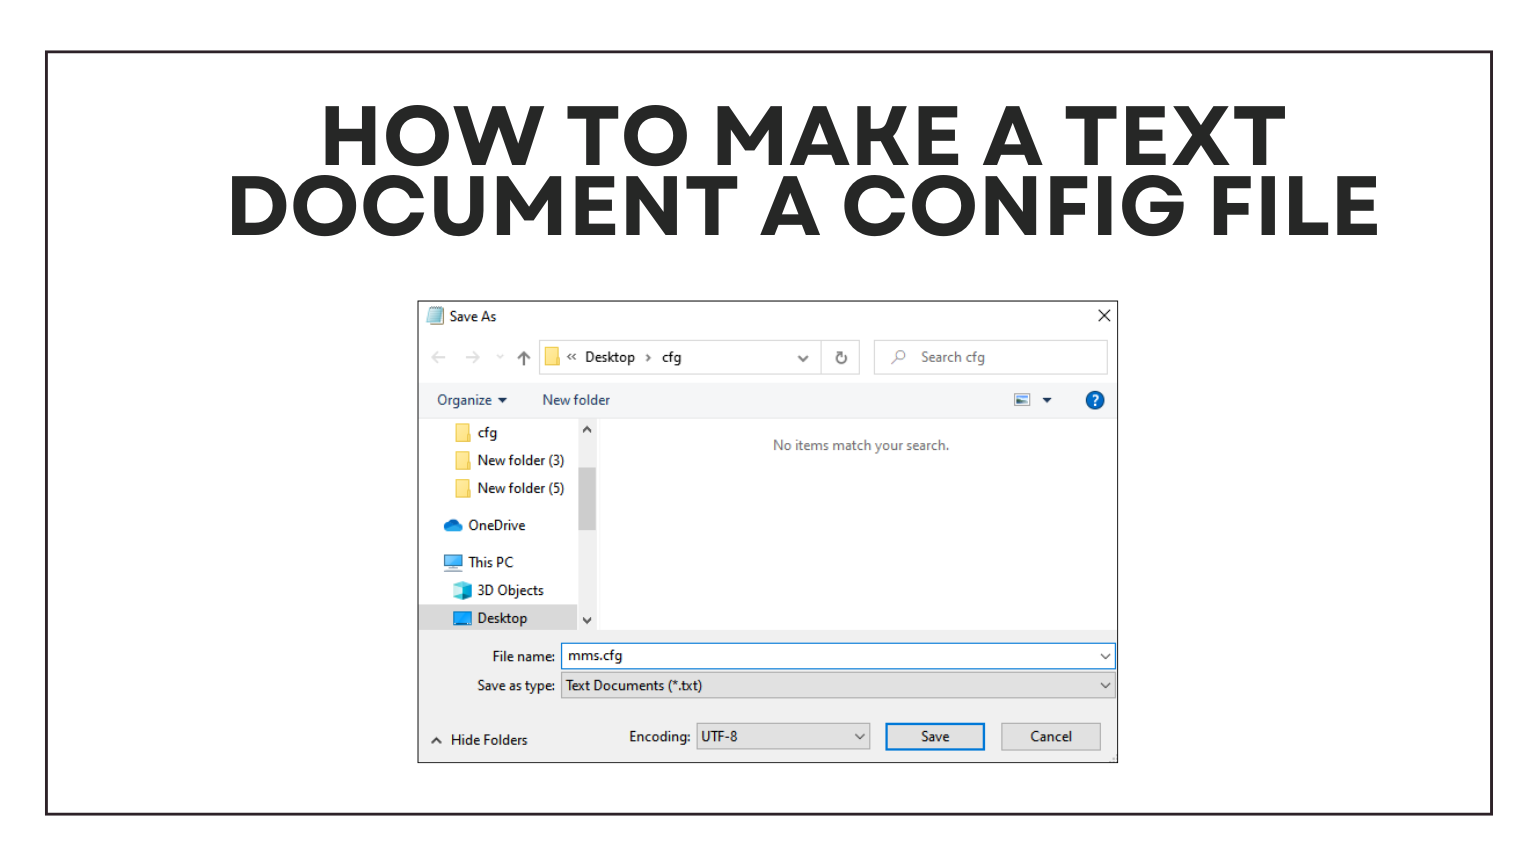
Step 4: Save the Document With .cfg Extension
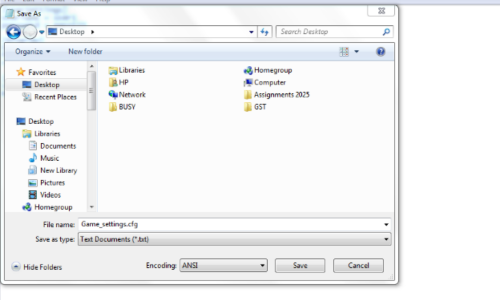
Once you are done with the code, the next step is saving the document, and adding ‘.cfg’ extension to the file name. To do so, you need to:
- Click ‘File > Save As’
- Choose ‘All Files’ in the ‘Save As’ dropdown
- Add ‘.cfg’ to the name of your file.
Select the destination folder and click ‘Save’.
Step 5: Add Comments for Clarity (Optional)
You can add comments to explain what each setting and section does. These comments are usually ignored when reading the file.
Step 5: Verify the CFG File Format
Make sure to cross-check the format of your config file before using it in an application or system.
This is how your outcome should look like:
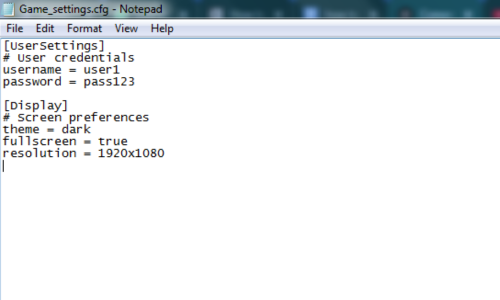
The steps mentioned above can help you easily convert a text document into a CFG file, serving various practical purposes in both developmental and system configurations.
3 Reasons Why You Need a CFG file
CFG files can offer you immense flexibility and control necessary over your software applications. This ensures that the software runs smoothly and according to your preferences. The following three reasons further explain the need for a config file:
- Customizable Settings: You can personalize a system or software stored in CFG files to suit your needs. For instance, in an application, the config file may have stored your preferred settings. You can customize them by simply editing the file.
- Simplifying Updates: Changing configuration files is much easier than modifying the program codes, in case you need to update settings. This not only allows quicker updates but also makes the whole process less error-prone.
- Automation and Consistency: CFG files automate routine tasks, saving you from the nuisance of doing even the simplest of tasks manually. This also helps ensure consistent setups.
These reasons make config files a useful tool for anyone who wishes to streamline developmental workflows.
3 Tips for Working With CFG Files
Working with CFG files can be quite complicated, especially if you are a beginner. The best practices listed below will help you maintain reliable and consistent configurations:
- Understand the Syntax and Structure: Most CFG files use key-value pairs or sections market with headers. Pay special attention to case sensitivity, special characters, and spacing.
- Create Backup Files Before Editing: Having backup config files ensures you can restore the original files in case something goes wrong.
- Add Comments for More Clarity: Adding comments enables you to understand the purpose of each configuration when you return to it later. This is especially useful if you are sharing the file with others.
These tips will streamline your work and help you ensure the proper functioning of your CFG files.
Wrap Up!
Configuration files store settings or parameters that a program reads to function properly. By simplifying configuration management and enabling automation, they help streamline developmental processes and optimize workflows. These files are created for a variety of reasons including customization of settings, simplifying updates, and ensuring consistency.
Following the steps and tips mentioned in this article will allow you to easily convert a text document into a config file.
FAQ's
How to save a CFG file?
To save a CFG file, click ‘File > Save As’, select ‘All Files’ in the ‘Save as Type’ dropdown, add the ‘.cfg’ extension to the name of your file, choose a location to save, and then click ‘Save’.
What is a CFG file used for?
CFG files are used to store configuration settings for software or applications. It enables programs to apply specific settings without needing to configure them every time they run.
Can I edit a CFG file?
Yes, you can edit a CFG file by simply opening it with a text editor of your choice, making changes, and saving it with the ‘.cfg’ extension.


Leave a Reply